The standard Ender 3 S1 model shown in the installation video comes with a DWIN-style color display that uses the same type of cable as our LCD kit.
The Ender 3 S1 Pro and Ender 3 S1 Plus models DO NOT use the same stock display as shown in the video. These printers use touchscreen displays that use different cables with white connectors on them. These cables CANNOT be reused when installing our LCD kits.
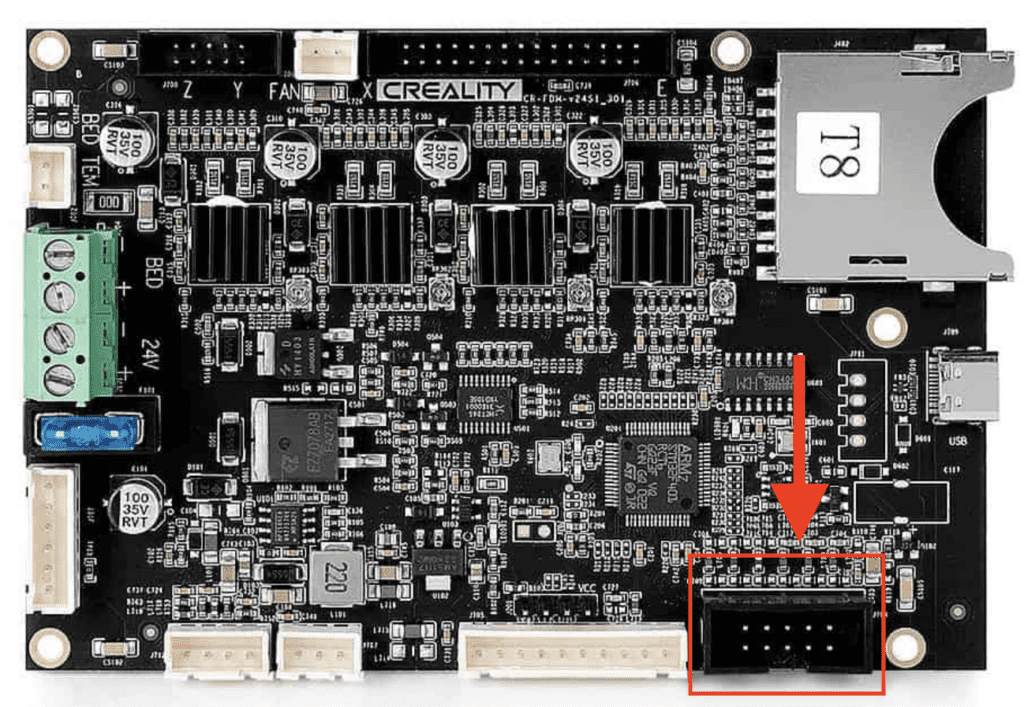
When installing the LCD kit onto the Ender 3 S1 Pro or Ender 3 S1 Plus, you will need to open the bottom of the printer to access the electronics inside. You will remove the existing display and its cables entirely. Next to the cable you remove, there will be a standard 10-pin header for the new LCD to plug into, shown in the image below:

You must run the cable from this LCD header to the EXP3 port on the back of the actual LCD panel. Once this cable is installed, you can close the bottom panel of the printer and proceed with the firmware installation procedure as shown in the video.
